
Taking your high-performance gaming rig on the road can feel like a daunting task. The thought of entrusting your expensive and delicate hardware to baggage handlers or security checks is enough to make any gamer anxious. However, with the right preparation and knowledge, you can ensure your PC arrives safely at your destination, ready for action.

This guide on how to travel with a gaming pc is designed to walk you through every step of the process. From understanding airline regulations to packing your components securely, we’ll provide the detailed information you need. Traveling with your gaming PC doesn’t have to be a stressful experience; it can be a smooth and successful part of your journey.
Airline Rules for Traveling
Navigating airline rules is the first hurdle when planning to travel with your gaming PC. Policies can vary between carriers, so it’s essential to check with your specific airline before you head to the airport. Generally, you have two options: checking your PC as baggage or taking it as a carry-on. A full desktop tower will almost certainly need to be checked, as it exceeds the size and weight limits for cabin baggage. Some smaller, Mini-ITX builds might fit within carry-on dimensions, but you must verify this with the airline.
When checking your PC, be aware of weight limits and potential fees for oversized or overweight baggage, which a gaming PC often is. It’s also crucial to understand the airline’s liability for damaged items. Most airlines have limited liability for checked electronics, which may not cover the full value of your high-end components.
Consider purchasing additional insurance either through the airline or a third-party provider for peace of mind. Informing the check-in staff that you are transporting fragile electronic equipment can sometimes result in a “fragile” sticker, though this offers no guarantee of special handling.
Packing Your Gaming PC Properly
Proper packing is the most critical factor in ensuring your gaming PC survives the journey. The goal is to immobilize all internal components and cushion the entire case from external impacts. Your PC’s original packaging is often the best choice, as it includes custom-fitted foam designed to hold the case securely. If you no longer have the original box, find a sturdy, double-walled cardboard box that is several inches larger than your PC on all sides.
Inside the case, the main components at risk are the graphics card (GPU), the CPU cooler, and any mechanical hard drives. Heavy GPUs can put immense stress on the motherboard’s PCIe slot during transit. It’s highly recommended to remove the GPU, place it in an anti-static bag, and pack it in a separate, well-padded box. You can either pack this in your checked luggage or, even better, carry it with you in your cabin baggage.
Large air coolers for CPUs should also be removed to prevent them from ripping off the motherboard. Liquid cooling systems (AIOs) are generally more secure, but it’s still wise to check for any potential leak points. Fill the empty space inside the PC case with packing foam, bubble wrap, or even clothes to prevent any remaining components from shifting.
7 Simple Step-By-Step Guidelines on How to Travel With a Gaming PC
Step 1: Back Up Your Data and Prepare Your System
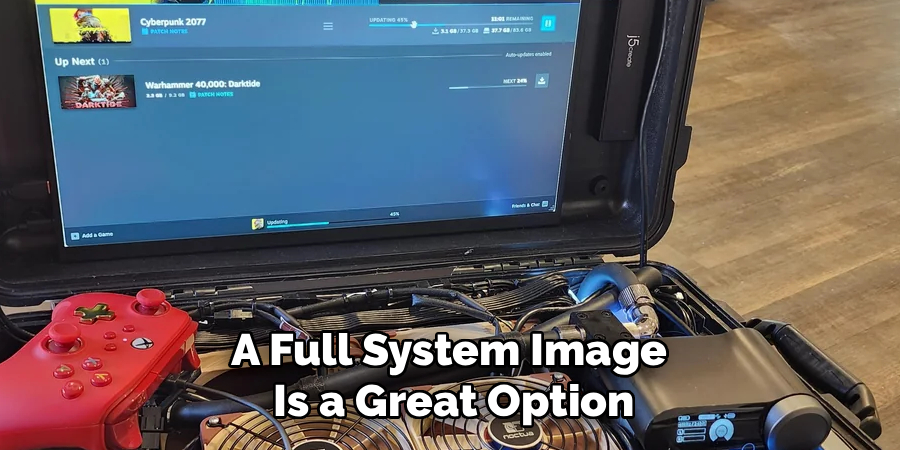
Before you unplug a single cable, the absolute first step is to secure your digital assets. Hardware can be replaced, but your data, game saves, and personal files cannot. Perform a complete backup of your system to an external hard drive or a cloud service. This ensures that even in a worst-case scenario, your most important information is safe and recoverable. A full system image is a great option as it allows for a quick restoration on a new or repaired machine.
Once your data is secure, prepare your computer for shutdown. Properly log out of all accounts and perform a full shutdown of the operating system. After it’s completely off, switch off the power supply unit (PSU) using the switch on the back of the case and unplug the main power cord.
This prevents any accidental power-ups during the packing process and protects your components from static discharge. This is also a good time to take photos of your cable connections, both inside and outside the case, so you have a visual reference for reassembly later.
Step 2: Disassemble Critical Internal Components
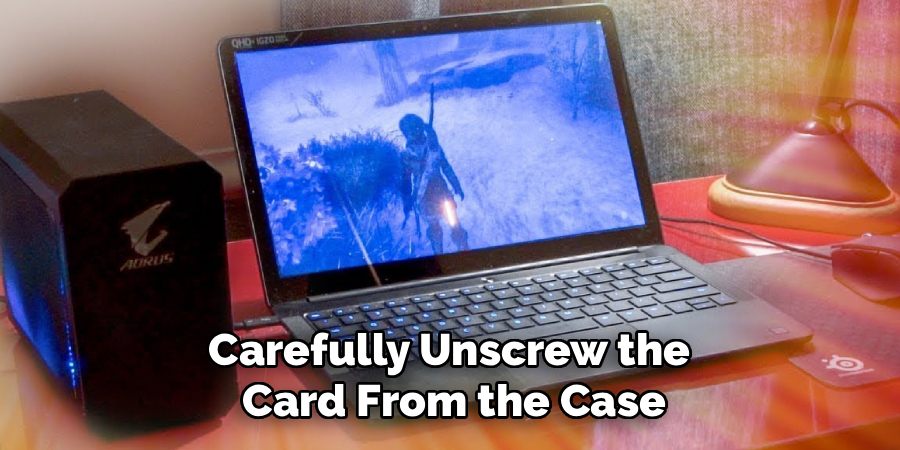
The vibrations and impacts of travel can be destructive to the internal components of your PC. The most vulnerable parts are heavy components that are cantilevered off the motherboard. Your graphics card is the primary concern. Its weight and size put significant strain on the PCIe slot, and a hard jolt can crack the slot or the card itself. Carefully unscrew the card from the case, release the PCIe slot locking tab, and gently remove it. Place it immediately into an anti-static bag to protect it from static electricity.
Similarly, large and heavy air-cooled CPU heatsinks can pose a risk. The leverage they exert on the motherboard and CPU socket can cause damage during transit. If you have a substantial tower cooler, it’s best to uninstall it. Stock coolers or smaller, low-profile coolers are generally fine to leave in place. All-in-one (AIO) liquid coolers are typically secure, as their weight is distributed between the radiator and the CPU block. However, you should still inspect the tubing and connections to ensure they are firm. Any traditional spinning hard disk drives (HDDs) should also be considered for removal, as their moving parts are sensitive to shock.
Step 3: Secure and Pad the Interior of the PC Case
After removing the most vulnerable components, the next step is to secure everything that remains inside the case. The goal is to prevent any movement. Even a loose cable can get snagged or cause damage if it whips around during transit. Use zip ties or twist ties to bundle loose cables together and secure them to the case frame. Ensure that RAM modules and any remaining drives are firmly seated in their slots. Give them a gentle push to confirm they are locked in place.
With everything tied down, you need to fill the empty void within the case. This provides internal support and prevents any components that might come loose from rattling around. Expandable packing foam packs are an excellent option, as they conform perfectly to the shape of the empty space. Alternatively, you can carefully stuff the interior with anti-static bubble wrap, soft clothing, or packing paper. Be thorough and fill the space snugly, but do not apply so much pressure that you risk bending or damaging components. The aim is to create a solid, cushioned block inside your PC case.
Step 4: Pack the Removed Components Separately and Securely
The components you removed in Step 2 require their own careful packing. The graphics card is the most valuable and fragile of these. If you still have its original box and anti-static bag, use them. This is the ideal packing solution. If not, wrap the card in an anti-static bag and then wrap it thoroughly in multiple layers of bubble wrap. Place this bundle inside a small, sturdy cardboard box, filling any extra space with more packing material to prevent movement.
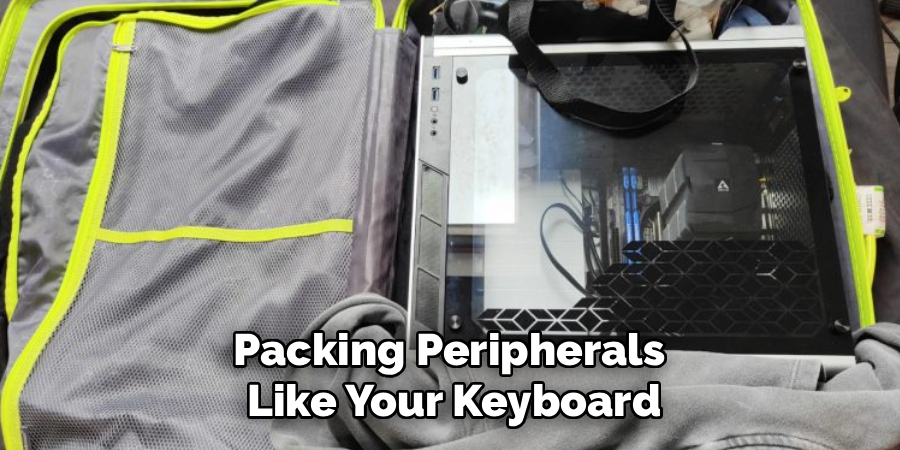
Treat your CPU cooler and any removed hard drives with similar care. Place them in anti-static bags (especially the hard drives) and cushion them well within their own boxes. It is highly recommended to pack these sensitive and valuable components in your carry-on luggage if possible. This keeps them with you at all times, protecting them from the rough handling of checked baggage and extreme temperature changes in the cargo hold. Packing peripherals like your keyboard, mouse, and headset in your carry-on is also a good idea.
Step 5: Prepare the PC Tower for External Packing
Now that the inside of your PC is secure, it’s time to protect the exterior. Begin by wrapping the entire PC tower in a layer of plastic wrap or placing it in a large plastic bag. This will protect it from scratches, dust, and potential moisture. Pay special attention to any tempered glass or acrylic side panels. You can add a layer of cardboard or thick foam sheeting directly against the glass panel for extra protection against impacts before you wrap the whole case.
Once wrapped, prepare the tower for its journey in the main shipping box. If you are using the original box your PC case came in, it will likely have custom-molded styrofoam or foam inserts. Place these around the tower as they were originally designed. These inserts are specifically shaped to absorb shock and hold the case firmly in the center of the box, which is the safest place for it to be. This suspension system is key to protecting the PC from drops and bumps.
Step 6: Box and Cushion the PC Tower for Maximum Protection
Choosing the right box is crucial. If you don’t have the original packaging, you must find a strong, double-walled cardboard box that gives you at least 3-4 inches of clearance on all sides of the PC tower. This space is essential for creating a protective buffer zone. Start by lining the bottom of the box with a thick layer of cushioning material, such as foam panels, bubble wrap, or crumpled packing paper, to create a soft base for the PC to rest on.
Carefully lower your wrapped PC tower into the center of the box, on top of the bottom cushioning layer. Now, fill all the surrounding gaps on the sides and top with more packing material. Be generous with the cushioning; the goal is to ensure the PC case cannot shift in any direction. Once the box is packed tightly, give it a gentle shake. You should not feel or hear any movement from inside. If you do, open the box and add more packing material until the contents are completely immobilized.
Step 7: Label the Box Clearly and Consider Insurance
The final step is to seal and label your package properly. Use high-quality packing tape to seal all seams on the box, including the top and bottom. It’s a good practice to use the H-taping method, where you tape along all the edge seams, for maximum strength. Once sealed, label the box clearly with large, bold letters. Write “FRAGILE,” “HANDLE WITH CARE,” and “THIS WAY UP” with arrows pointing toward the top on all sides of the box. This communicates the delicate nature of the contents to anyone who handles it.
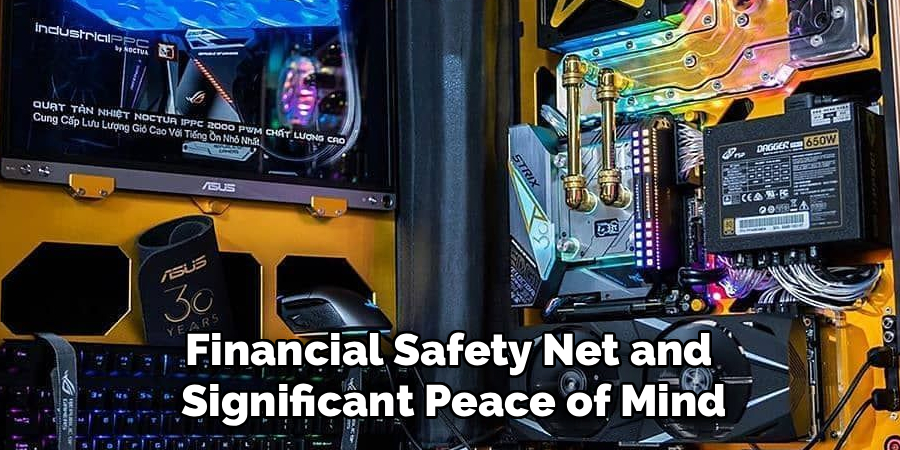
Finally, attach your shipping label with your destination address and contact information. If you are checking the box as luggage on a flight, ensure the airline’s baggage tag is securely fastened. As mentioned earlier, standard airline liability for checked baggage is often insufficient to cover a gaming PC. Seriously consider purchasing supplemental insurance that covers the full replacement value of your computer. This provides a financial safety net and significant peace of mind for your travels.
Following these steps on how to travel with a gaming pc can help ensure that your precious device arrives at your destination safely and in one piece. However, it’s also important to take care of your gaming pc during the trip itself.
Tips for Flying With Your Gaming PC
Flying with a gaming PC requires careful planning and attention to detail to avoid damage during transit. Here are some useful tips to ensure a smooth and safe experience:
Invest in a Quality Travel Case
Use a durable, padded travel case or hard-shell suitcase to protect your gaming PC. Look for cases designed for electronics that offer shock absorption and secure straps to hold the device firmly in place.
Back Up Your Data
Before traveling, take the time to back up important files and game data. This precaution ensures your data is safe in case of accidental damage or hardware issues during the trip.
Remove or Secure Internal Components
If possible, remove components such as the graphics card or hard drive and pack them separately for added safety. If they remain inside the PC, secure them properly to avoid shifting and damage during handling.
Use Anti-Static Bags
Place removable components in anti-static bags to protect them from static electricity. This helps prevent damage to sensitive internal parts while traveling.
Label Your Equipment
Clearly label your PC or travel case with your contact information. This will make it easier to recover your belongings if they are misplaced by airline staff.
Keep It as Carry-On
If allowed by the airline, carry your gaming PC as part of your carry-on luggage. This gives you better control and reduces the risk of damage often associated with checked baggage.
Know the Airport Security Procedures
Be prepared to remove your PC from its case during security screenings. Notify the security personnel and handle the device carefully to avoid mishaps.
By following these tips, you can minimize the risks of transporting your gaming PC and ensure it arrives safely and ready for your next gaming adventure.
What NOT to Do?
- Do not leave heavy components like the GPU or a large CPU cooler installed in the motherboard.
- Do not check your PC without packing it properly inside a sturdy, well-cushioned box.
- Do not forget to back up your data before you start packing.
- Do not rely solely on “Fragile” stickers to protect your equipment.
- Do not check a PC with a tempered glass side panel without adding extra padding to the panel.
Environmental and Ethical Considerations
Traveling, especially by air, has a significant carbon footprint. Transporting heavy items like a gaming PC contributes to this impact by increasing the aircraft’s weight and fuel consumption. When possible, consider if you truly need your entire setup at your destination. Could a gaming laptop or a cloud gaming service suffice for your trip?
If you must travel with your PC, packing efficiently and avoiding excess materials can help minimize waste. Ethically, be mindful of the electronic waste (e-waste) aspect. Ensure your components are handled with care to prolong their lifespan, preventing the need for premature replacements and reducing the environmental burden associated with producing and disposing of electronics.
Frequently Asked Questions
Q1: Can I Take My Gaming Pc As A Carry-On?
A1: This depends entirely on the size of your PC and the airline’s carry-on restrictions. Most standard mid-tower or full-tower ATX cases are too large and heavy to qualify as carry-on luggage. However, if you have a very compact Small Form Factor (SFF) or Mini-ITX build, it might fit within the dimensional limits. You must measure your case and check the specific dimensions and weight allowances for your airline before you travel. Even if it fits, be prepared for security to ask you to remove it from your bag for screening.
Q2: Is It Safe To Travel With A Liquid-Cooled Pc?
A2: Traveling with an All-in-One (AIO) liquid cooler is generally safe, as they are sealed units and not explicitly prohibited by the TSA. The risk of a leak is low if the unit is in good condition. However, custom open-loop liquid cooling systems are a different story. You must completely drain all liquid from a custom loop before flying. Traveling with any amount of liquid in a custom loop is extremely risky, as changes in air pressure could cause fittings to leak, catastrophically damaging your components.
Q3: Should I Buy Insurance When Flying With My Pc?
A3: Yes, it is highly recommended to purchase additional insurance. Airlines’ standard liability for lost or damaged checked baggage is typically very limited, often not even enough to cover the cost of a mid-range graphics card. Check if your homeowner’s or renter’s insurance policy covers personal property in transit. If not, purchase supplemental insurance from the airline or a third-party travel insurance provider that specifically covers electronics for their full replacement value. This is a small price to pay for significant financial protection and peace of mind.
Conclusion
Traveling with your gaming PC requires careful planning and thorough preparation, but it is entirely achievable. By backing up your data, disassembling key components, and using robust packing techniques, you can drastically reduce the risk of damage. Remember to research airline rules in advance, label your package clearly, and invest in insurance for complete peace of mind.
While the process may seem intensive, the reward is having your personalized, high-performance gaming station with you wherever you go. Safe travels, and happy gaming. Thanks for reading this guide on how to travel with a gaming pc.