
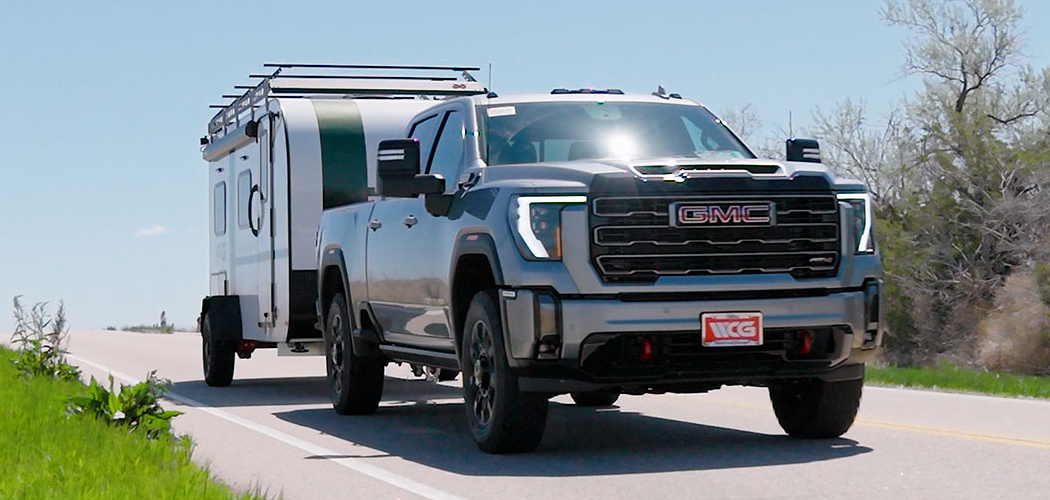
Getting ready for a road trip in your travel trailer is an exciting time. The open road calls, promising new adventures and unforgettable memories. But before you can head out, there’s a crucial first step: safely and securely hooking up your travel trailer to your truck. This process might seem complicated at first, but with the right knowledge and a bit of practice, it becomes a simple routine.

This guide on how to hook up a travel trailer to a truck is designed to walk you through the entire process, from gathering the necessary tools to performing final safety checks. Following these steps carefully will ensure your trailer and truck are connected correctly, providing peace of mind as you start your journey. A secure connection is the foundation of a safe and enjoyable trip for you and everyone else on the road.
Tools and Equipment Needed
Before you start the process of connecting your travel trailer to your truck, it’s important to gather all the necessary tools and equipment. Here is a list of items that will make the process easier and help ensure a successful connection:
Tow Hitch Receiver:
This is the main piece that connects your truck to the trailer. Make sure it is properly installed on your truck before attempting to connect.
Ball Mount:
This is what attaches to the tow hitch receiver on one end and holds the trailer’s coupler on the other end.
Hitch Ball:
This attaches to the ball mount and locks into place with a pin or clip.
Wheel Chocks:
These are wedges placed behind the wheels of the trailer to prevent it from rolling while you are hitching.
Safety Chains:
These provide an extra level of security by connecting your truck and trailer together in case the coupler fails during transit.
Safety Precautions
Safety should always be your top priority when working with heavy equipment like a truck and trailer. Adhering to these safety precautions will minimize risks and prevent accidents.
- Always work on level ground. Attempting to hook up on an incline can cause the trailer or truck to roll unexpectedly.
- Chock the wheels of the travel trailer on both sides before you start. This is the most important step to prevent any movement.
- Wear appropriate footwear, such as closed-toe shoes, to protect your feet.
- Keep children and pets at a safe distance from the work area.
- Move slowly and deliberately. Rushing through the process can lead to mistakes and injuries.
- If you have a spotter, establish clear hand signals before backing up the truck.
- Double-check every connection before you drive away. Never assume something is secure without verifying it yourself.
7 Simple Step-By-Step Guidelines on How to Hook Up a Travel Trailer to a Truck
Step 1: Prepare the Truck and Trailer
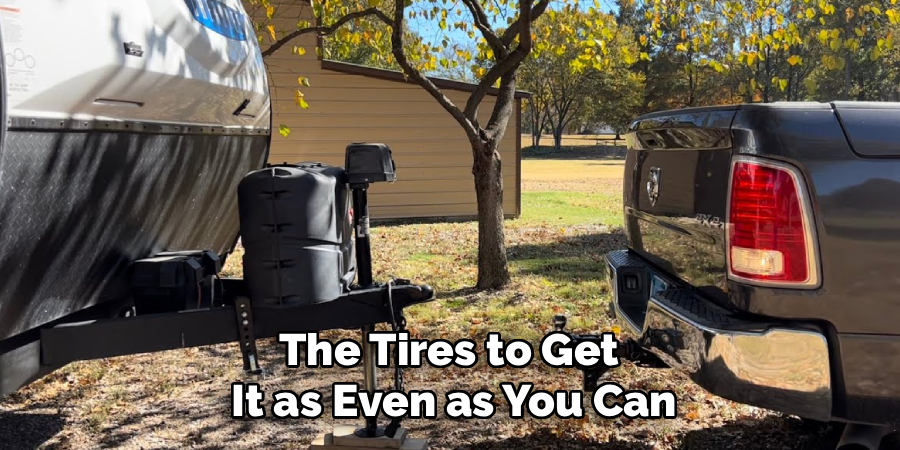
The first step is to prepare both your truck and trailer for the connection process. This initial setup is vital for a smooth and safe hook-up. Start by ensuring your truck is parked on a level surface, as close to the trailer as possible and in a straight line with it. This alignment will make backing up to the coupler much easier. If the trailer isn’t already level, use leveling blocks under the tires to get it as even as you can. This prevents strain on the jack and hitch components later.
Once the trailer is stable, place wheel chocks securely against both sides of its tires. This is a non-negotiable safety measure that prevents the trailer from rolling forward or backward while you are working between it and the truck. Next, inspect your hitch receiver on the truck. Make sure it is clean and free of any dirt, rust, or debris that could interfere with a secure connection. Insert the ball mount into the receiver and secure it with the hitch pin and clip. Confirm that the hitch ball size matches the trailer’s coupler size, which is usually stamped on the coupler itself.
Step 2: Align the Truck with the Trailer
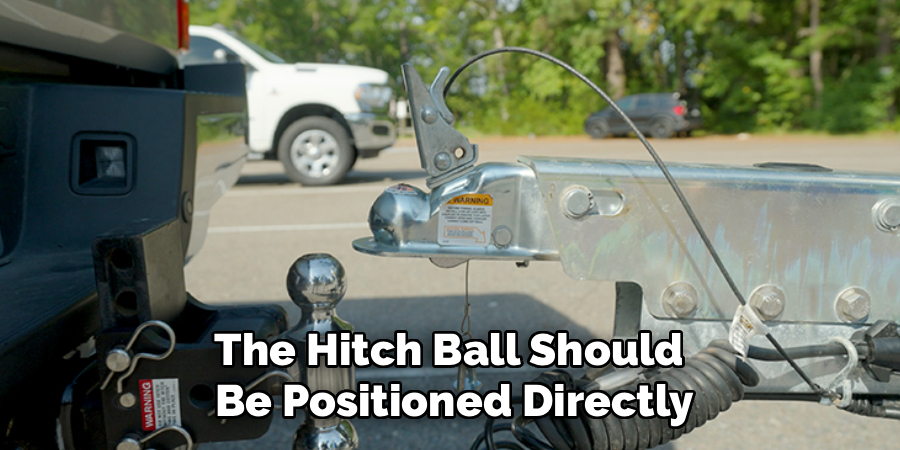
Proper alignment is key to connecting the hitch ball and coupler without difficulty. The goal is to back your truck up so the hitch ball is directly underneath the trailer’s coupler. If you have a backup camera, this process is much simpler. Use the camera’s guidelines to help you center the hitch ball with the coupler. If you don’t have a camera, this is where a spotter becomes invaluable. Have your spotter stand to the side of the trailer, where they can see both the hitch ball and the coupler and can clearly communicate with you.
Move the truck backward slowly and in small increments. Have your spotter guide you with clear hand signals or verbal commands. It’s better to make several small adjustments than to try to get it perfect in one go. If you need to pull forward to correct your angle, do so. Take your time to get the alignment just right. The hitch ball should be positioned directly under the open coupler, ready for you to lower the trailer onto it. Being patient during this step will save you a lot of frustration.
Step 3: Lower the Trailer Coupler onto the Hitch Ball
With the truck and trailer perfectly aligned, it’s time to lower the trailer onto the hitch ball. Use the trailer’s tongue jack to slowly lower the coupler. If you have an electric tongue jack, this will be as simple as pressing a button. If you have a manual jack, you will need to crank it down. Watch closely as the coupler descends over the ball. Make sure it is centered and not coming down at an angle, which could cause it to get stuck or damaged.
Continue lowering the trailer until the full weight of the tongue is resting on the hitch ball. You will see the back of the truck dip slightly as it takes the weight. Once the coupler is fully seated on the ball, raise the tongue jack slightly, just enough to lift the rear of the truck a small amount. This is a crucial test to confirm that the coupler is securely attached to the ball. If the truck lifts with the trailer, you know you have a solid connection. If it doesn’t, the coupler is not properly seated, and you will need to raise it and try again.
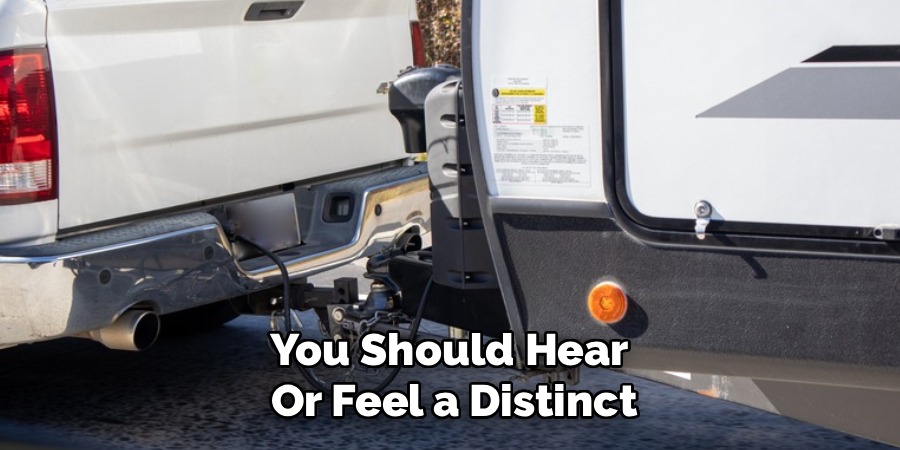
Step 4: Secure the Coupler Latch
Now that the trailer’s weight is on the hitch ball, you must secure the coupler latch. This mechanism locks the coupler onto the hitch ball, preventing it from detaching while you are on the road. The design of latches can vary, but most involve a lever or handle that you need to push down or slide into a locked position. You should hear or feel a distinct click as it engages. It should be a firm and positive engagement; a loose or sloppy latch is a sign of a problem.
After securing the latch, add the safety pin or lock. This is a secondary safety device that prevents the latch from accidentally coming undone due to vibrations or bumps in the road. Most couplers have a small hole through the latch mechanism where a pin or padlock can be inserted. This simple step adds an essential layer of security. Always double-check that the latch is fully engaged and the safety pin is in place before moving on to the next steps. This is one of the most critical parts of the process.
Step 5: Attach the Weight Distribution System and Sway Control
If your setup includes a weight distribution system, now is the time to attach it. This system helps to distribute the trailer’s tongue weight more evenly across the truck’s and trailer’s axles, leading to a more level ride and better steering control. Start by inserting the spring bars into the sockets on the hitch head. Then, use the provided lift tool or the trailer’s tongue jack to create enough slack to attach the chains or brackets to the trailer’s A-frame. You may need to raise the trailer tongue and the back of the truck together to get the spring bars into place.
Once the spring bars are attached, lower the tongue jack completely so the full weight is on the system. The spring bars should be roughly parallel to the trailer frame. If you also have a separate sway control bar, attach it according to the manufacturer’s instructions. This device helps to dampen the side-to-side movement known as trailer sway, which can be caused by crosswinds or passing trucks. Proper setup of both these systems is critical for safe handling, especially with larger and heavier travel trailers.
Step 6: Connect the Safety Chains and Breakaway Cable
With the mechanical connections made, the next step is to attach the safety chains and the breakaway cable. These are crucial backup systems in case the primary hitch connection fails. The safety chains should be crossed under the trailer tongue before being connected to the truck’s hitch receiver. Crisscrossing the chains (right chain to left loop, left chain to right loop) creates a cradle that would catch the trailer tongue if it ever became disconnected from the hitch ball, preventing it from digging into the pavement.
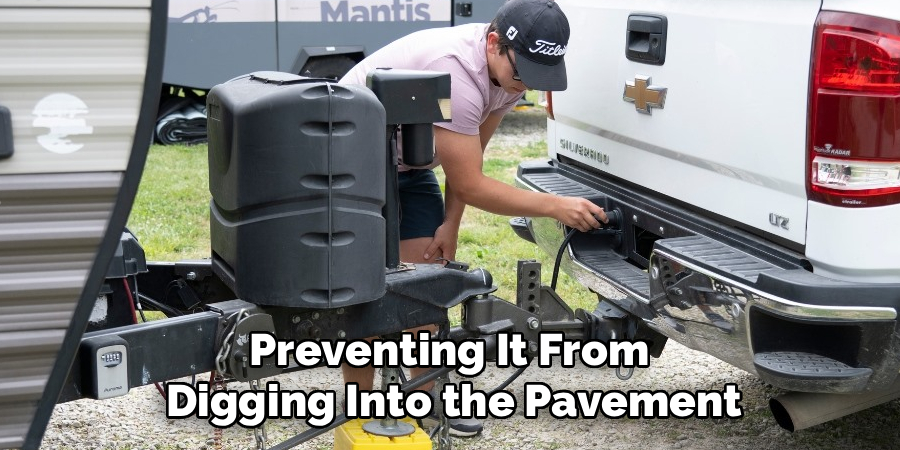
Make sure the chains have enough slack to allow for sharp turns, but are not so long that they drag on the ground. Next, connect the emergency breakaway cable. This cable is designed to activate the trailer’s electric brakes if it completely separates from the tow vehicle. Attach the cable’s hook to the truck’s frame or hitch receiver, but not to the safety chains or the hitch pin. It needs its own separate, secure connection point. Like the chains, ensure it has enough slack for turns but won’t drag.
Step 7: Plug in the Electrical Connector and Check the Lights
The final connection to make is the electrical one. This powers the trailer’s running lights, brake lights, and turn signals, and it also charges the trailer’s battery while you drive. Locate the 7-pin electrical connector on your truck, which is usually near the hitch receiver. Align the plug from the trailer with the socket on the truck and push it in firmly. Most connectors have a spring-loaded cover that will help hold the plug in place. Ensure the cord has enough slack for turns but is not dragging on the ground.
Once connected, you must perform a full light check. With a spotter’s help, test the running lights, left and right turn signals, brake lights, and hazard lights. Verify that every light on the trailer is functioning correctly. This is not just a safety requirement; it’s a legal one. Driving with inoperative trailer lights is dangerous and can result in a traffic ticket. This final check confirms that your trailer is visible to other drivers and that your braking and turning intentions are clearly communicated.
Following these steps on how to hook up a travel trailer to a truck will ensure a safe and stress-free towing experience. However, there are a few additional tips that can further enhance your trailer towing skills.
Common Mistakes to Avoid
- Forgetting to chock the trailer wheels before starting.
- Misjudging the alignment and hitting the truck’s bumper.
- Not latching the coupler securely and forgetting the safety pin.
- Connecting safety chains without crossing them or leaving them dragging.
- Failing to perform a complete light check before driving away.
Maintenance Tips
Regular maintenance ensures your towing equipment remains in safe, working order for every trip.
- Regularly inspect the hitch ball for wear and tear. Ensure it is tightened to the manufacturer’s torque specifications.
- Clean and lubricate the hitch ball and coupler mechanism periodically to ensure smooth operation and prevent rust.
- Check your safety chains for any weak links, cracks, or corrosion. Replace them if you find any signs of damage.
- Inspect the electrical plug and socket for corrosion or bent pins. Clean the contacts with an appropriate electrical cleaner if needed.
- Examine your tires on both the truck and trailer, checking for proper inflation and any signs of wear or damage before each trip.
- Test your trailer’s breakaway system periodically to ensure the battery is charged and the system functions correctly.
Frequently Asked Questions
Q1: How Do I Ensure My Trailer Is Securely Attached?
A1: To ensure a secure attachment, perform a “pull test.” After latching the coupler onto the ball, use the tongue jack to lift the trailer tongue and the rear of the truck together slightly. If the truck’s suspension rises, it confirms a solid connection. Also, always visually inspect that the coupler latch is fully engaged and secured with its safety pin or lock. Finally, give the connection a firm tug to ensure there is no play.
Q2: What Happens If I Don’t Cross the Safety Chains?
A2: Crossing the safety chains creates a “cradle” underneath the trailer tongue. If the trailer were to detach from the hitch ball, this cradle would catch the tongue and prevent it from dropping onto the road. This gives you some measure of control to slow down and pull over safely. If the chains are not crossed, the tongue could dig into the pavement, causing a loss of control and a potentially catastrophic accident.
Q3: How Do I Know What Size Hitch Ball I Need?
A3: The required hitch ball size is determined by the trailer’s coupler. The size is almost always stamped directly onto the top or side of the coupler itself. Common sizes are 1-7/8 inches, 2 inches, and 2-5/16 inches. It is essential to use a hitch ball that exactly matches the coupler size. Using the wrong size ball can lead to the trailer detaching from the truck while in motion. Always verify the size before you hook up.
Conclusion
Hooking up a travel trailer to a truck correctly is a skill that is fundamental to the safety and enjoyment of your RV adventures. By following these detailed steps on how to hook up a travel trailer to a truck, from initial preparation to the final light check, you can build confidence and turn this task into a quick and easy routine. Remember that taking your time, prioritizing safety, and double-checking your work are the most important parts of the process.
With a securely connected trailer, you can pull out of your driveway and onto the open road with the assurance that you’ve done everything right. The world is full of beautiful destinations waiting to be explored, and a properly hitched trailer is your reliable partner for the journey ahead. Happy and safe travels
About
Larry Mays is a distinguished figure in the world of global exploration, with a decade of expertise creating innovative and sustainable travel itineraries. His professional focus lies in merging authentic local experiences with modern travel logistics, fostering journeys that are both culturally immersive and environmentally conscious. As the author of Travelorix, Larry delves into the art and science of modern voyaging, inspiring solo travelers and industry professionals alike.
Education
RMIT University (Melbourne, Australia) Associate Degree in Design (International Tourism)
-
Focus on sustainable tourism, industry-driven logistics, and practical expedition planning.
-
Gained hands-on experience with digital mapping tools and travel management software.
Nottingham Trent University (United Kingdom) Bachelor’s in Global Travel and Hospitality Design (Honors)
-
Specialized in experience design with a focus on blending cultural heritage with modern hospitality techniques.
-
Participated in industry projects, working with major hospitality brands and eco-resorts to gain real-world insights.
Publications and Impact
In Travelorix, Larry shares his insights on travel planning processes, cultural ethics, and strategies for efficient, low-impact exploration. His writing bridges the gap between local artisan knowledge and modern traveler needs, making it a must-read for both budding backpackers and seasoned travel consultants.